Tuesday, October 16, 2007

A locked out fork, retarded hikers, failed bunny hops, and a big bike


As Guan Peng overslept, the guys decided to meet at 8:30 AM. The extra half-hour allowed me the luxury of firing off a particularly humorous post.


8:45 AM. Guan Peng is still asleep. Here, NicIz2HardKore is deciding which tree he would hang GP from.


I really don't know what is it with park users on this repressed, mollycoddled, schizophrenic, little island. At East Coast Park, jogging and cycling paths are clearly demarcated with signs and pictorial markings — and yet, many park users insist on walking on the cycling path. At the Bukit Timah Mountain Biking Trail, the same phenomenon occurs. Hikers and joggers enjoy access to 5 trails that are off-limits to mountain bikes, and yet, they persist in using the only trail that is open to mountain bikers.

The fact that the mountain biking trail only goes in one direction should give a clue to these hikers. Besides hikers and joggers, clueless teachers from the nearby MOE Adventure Centre regularly bring their charges — which can number up to 30 students in each group — on to the narrow trail.

It is one thing to set a policy where mountain bikers have to give way to the occasional hiker or jogger, but it is another matter altogether when hordes of joggers and hikers clog up a dedicated mountain biking trail, endangering themselves and mountain bikers. On weekends, I encounter more hikers and joggers than monkeys on this trail. It may very well be that the monkeys are more intelligent. Many mountain bikers have crashed whilst avoiding hikers and joggers on this trail.

On sundays, the Bukit Timah Nature Reserve is a zoo. While waiting for Guan Peng, we counted at least 8 joggers and hikers coming down the slope by the parking lot (as well as 6 clueless newbies riding the wrong way). On the first descent (i.e. short, steep concrete slope with potholes in the center), a balding, middle-aged man failed to yield immediately, causing me to switch to an undesired line. When I admonished him that this is a mountain biking trail, not a hiking trail, Baldy decided to wait until I was up the other slope — and him, a safe distance away — before he yelled in reply, "GET LOST!"

Mighty brave words, Baldy. Let me see you on the trail again and I might just run you over and perform donuts and figure-of-8s on that shiny pate of yours.

A little later, while descending a slope, Nic had to swerve hard to avoid another pair of clueless hikers. The crash tore the inner tube on his front wheel. He had to replace it at Echo Valley / Dairy Farm Quarry. It is unclear whether Arthur meant Nic has 2 punctures or Nic mowed down 2 stupid hikers. Nic is considering getting some tungsten carbide studded snow tires to shred stupid hikers into little, manageable chunks (think of a wood chipper).


Back at the same place. Here, we are convincing NicIz2HardKore of the feasibility of bunnyhopping the barrier.

RED JERSEY GUY:  It can be done. Hop the 1st barrier, then jump off your bike. This friendly bush will catch you.
ARTHUR:  It will make a great pic!
BEN:  Think, man! If you don't make it, you might be downgraded to Pes F. You may not even have to serve anymore NS.
NIC [Aside] :  Are these guys my friends? I think they're trying to get me killed.


*SCREEEECH!*


NIC:  Muthafu...!!
ARTHUR:  Smile for the camera!

At Rifle Range Road, I discovered that I had locked out the suspension fork for the entire ride. No wonder I was slipping on all the climbs. Doh!


After a big brunch at Binjai Park (and unsuccessfully trying to con Evie, the Char Siew Pao Babe, into giving the boys a ride back to East Coast), we decided to shed off some mud on Tay Cycle's nice, shiny floor. Here, Nic pulls off a handsfree trackstand on Cloe. At 20.5" (52 cm), Cloe's top tube is the height of Nic's saddle on his 14" (35.6 cm) 1x1 Surly. I.e. any mistake may turn him into a eunuch — this guy is truly hardcore!


Epilogue:
Total distance:  cyclo-computer 11.9 miles (19.3 km) / GPS dead
Total elevation climbed:  Altimeter 810 ft (247 m)

Shimano Hub TLC


'Decided to overhaul the Shimano hubs in my stable:


They consist of a pair of 1991 Shimano DX hubs (HB-M650 and FH-M650), a 1996 Shimano LX Parallax Front Hub (HB-M564), and a 1997 Shimano XT Rear Hub (FH-750).


SteveUK posted an excellent write up on this procedure. Click on the image or here.

Tools required

Chain whip
Hyperglide cassette remover
13 mm Cone wrench (front hub)
15 mm Cone wrench (rear hub)
17 mm Cone wrench. The locking nuts of the FH-M750 XT rear hubs come with flanges, regular wrenches won't fit.
Large Adjustable Crescent wrench
Long 10 mm Allen Hex Wrench


I rarely open up my hubs, but when I do, I replace the ball bearings.

Ball bearings come in different grades. The higher the number, the lower the tolerance. I.e. the greater its deviation from the dimensions of a theoretical, perfect sphere. Grade 1000 is too low a grade to be used in Shimano hubs. Grade 100 is acceptable. If memory serves, Shimano uses Grade 45 bearings in their hubs (up to XT). Shimano XTR and Dura-Ace use Grade 25. Enduro has Grade 5 ceramic bearings. Another dealer offers Grade 3 ceramic bearings.


John kindly pointed me to a local business that sells high quality bearings. Located along Jalan Besar, near Singapore Casket (where you can get beds with a lifetime guarantee :-D ), SLS Bearings (S) Pte Ltd is an authorized distributor of SKF bearings. Trivia: Leonardo da Vinci conceptualized the ball bearing around 1500 AD.

Bearings are sold in minimum quantities of 100 pieces. While I do not doubt the quality of the bearings delivered to SLS, their storage procedures seem inadequate. Many bearings were marred from oxidation.

3/16" (4.762 mm) Bearings
Grade 40
Part Number:  NIS RB 4.762 G40
SG$5 (US$3.41) for 100
Inspected:  50
Rejected:  10
Good:  40

1/4" (6.35 mm) Bearings
Grade 40
Part Number:  AKS RB 6.35 G40 (1/4)
SG$6 (US$4.10) for 100
Inspected:  100
Rejected:  61
Good:  39

Inspection was carried out without aid of a magnifying glass or high-powered desk lamp. If I used them, the rejection rate would probably be significantly higher. In other words, buy a lot more than you need.

Note: if you have Dura-Ace or XTR hubs, they come with Grade 25 bearings. I.e. Grade 40 is too low a grade for your hubs. At the very least, you need Grade 25 or better.


Removing the freehub cassette body bolt can be a royal pain in the rear as the 10mm Hex bolt is torqued down to 36 ft/lbs or 50 Nm. Many mechanics end up clamping the 10 mm Allen key to a vise and cranking on the wheel with both hands in order to break the bolt free.


Even at 7 - 15/32" (190 mm), the long Allen key may prove insufficient (without resorting to a vise). Park Tool has an extra long version to address this.


Never one to follow the crowd or convention, I sought another way.


I did it my way! A 16 - 5/8" (422.3 mm) Craftsman 1/2" Drive Flex Ratchet makes short work of the freehub cassette body bolt. With over 8 cm more leverage, at 19 - 13/16 (503.2 mm), the Craftsman 3/4" Drive Quick Release Ratchet is also a great contender.

Overkill? Maybe.
Fun? Definitely.
Why bring a tank to a knife fight?
Because it's fun.
Because it's viscerally more satisfying.
And more importantly, because I can  :-P

Tuesday, October 09, 2007

Numbers 22:21 (KJV)


The folks at Bike Works NYC show that it doesn't always have to be a choice between...


this,


or this.


As a wise man once said, "Come to kindly terms with your ass, for it bears you."


Related post:
Cycling, saddles, and impotence.

Monday, September 24, 2007

Pulau Ubin Group Ride


'Decided to join the "old boys" for a ride (although that meant getting up at 5 AM and riding to Changi Village from Dairy Farm on off-road tires. Ugh!).


Pulau Ubin Jetty. The last time I stepped on this island was in 1992. It is no longer as rustic as I remember it; many of the locals have switched from farming and prawn-rearing to earning tourist dollars.


After being turned away at the entrance to Tanjong Chek Jawa, we went up and down some nice rolling hardpack roads before taking a break at a rural drink kiosk.


The owner keeps a pet wild boar. Despite its fearsome appearance, it is actually very friendly and is as curious as a puppy. Pity about its scent though...


The kiosk owner warned us that it would rain shortly. We expected that, but we didn't know that the deluge would be so heavy and last so long. The moment it started pouring, I instantly lost 50% of my braking power — the other 4 riders, using disc brakes, remained unaffected. Later, all of Freddy's chain grease got washed away and his Specialized repeatedly suffered chain suck. After unsuccessfully looking for the BMX track, we entered an uncompleted track (managed by DirTraction, I believe).

In there, it quickly became apparent that narrow singletrack with tight switchbacks is not Cloe's forte. Due to Cloe's long top tube, I could not turn quick enough and repeatedly toppled over. Freddy was the perfect gentleman, patiently waiting for me each time and always encouraging.

So, it was raining cats and dogs (and perhaps, a few elephants as well). Although my clear Oakley M-frames were fogged up, I kept them on to shield me from mud sprays. As a result, I could only see 1 meter (3.3 feet) ahead. It didn't seem to be a problem as we were climbing slowly. Then, the trail crested and we started descending, turning and twisting through the cool, rain-soaked, tropical forest...

One moment, I could see the bluish blur of Freddy 1 meter ahead...

Then... suddenly, Treebeard this tree suddenly appeared out of nowhere.

WTF!!!???

*BAMN!*

After the stars cleared from my head , I discovered that my left foot had unclipped from the pedal, but not the right. My right hand was hanging on to the tree. My left foot and rear wheel was in the air, hanging over a 70-degree slope studded with boulders. Only the front wheel was touching the side of the trail.

I dangled there for sometime. Those tree-hugging idiots at UC Berkeley would have been proud of me.

15 minutes later, Freddy got tired of waiting and backtracked. He sees this guy dangling from a tree, with a bike hanging from his right foot, all suspended over a steep, rocky slope.

He stands there and laughs.

BEN:  WTF! Dude, either take the camera from my bag and take a picture or help me!

FREDDY:  Pull yourself up!

BEN:  Very funny! You are asking me to do a 1-arm pull up with a 10 kg bike attached to my foot! [Muttering] I think you watched too many reruns of Cliffhanger!

Freddy laughs again, walks over, grabs and unclips Cloe from my right foot so that I can shimmy up the tree to get back on the trail.


Much, much later, we found the rest of the guys at the seafood restaurant beside the jetty. From left, clockwise: Yew Tiam (Dude, I still owe you the ferry fare x2!), Ahmad, Peter, and Freddy.

Cloe didn't shine in today's ride because her geometry wasn't designed for tight, narrow, singletrack. She was built for the wide open, hyper-fast fire roads in Marin and the San Francisco Bay Area.


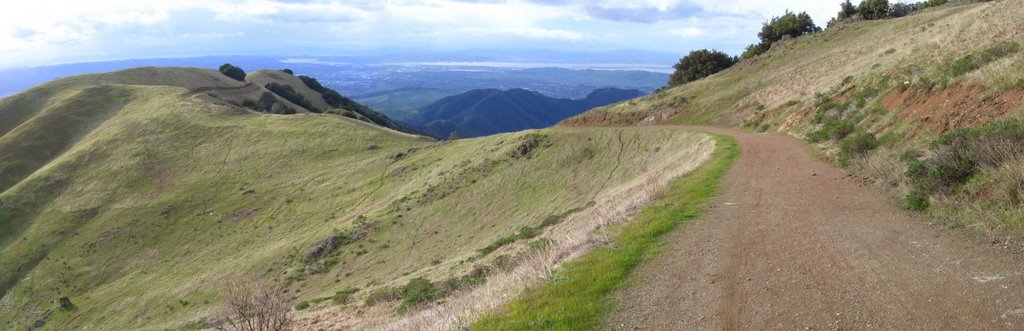
Deer Flat Road, Mount Diablo.


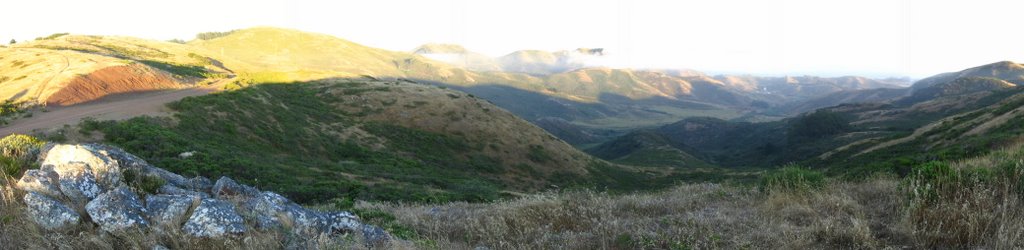
Bobcat Trail, Marin Headlands.

On trails such as these, it is not unusual to hit 48 mph (76.8 km/h) whilst descending. I also learned that Ritchey Logic V-brake pads melt when stopping from such speeds. Here, rather than being a handicap, a long top tube is advantageous as it enhances stability while carving high-speed turns.

Next trip to Pulau Ubin, it would be Ivy's turn  :-D


Epilogue:
Total distance:  cyclo-computer 66.1 miles (105.6 km) / GPS dead
Total elevation climbed:  Altimeter 2230 ft (680 m)

Thursday, September 20, 2007

Race Face X-Type BB bearings upgrade


Before clocking 900 km (562 miles), the Race Face X-Type Bottom Bracket (BB) bearings began to squeak and drag.

"DO NOT DISASSEMBLE" is stamped on each BB cup, but the units can be successfully taken apart by anyone with average mechanical aptitude. I will not duplicate Hercubus' excellent write up on the procedure (also applicable to Shimano External BBs). Chewieez also shot a 24-step pictorial of the process.


A combination plastic dust-cap-and-shim sits on both BB cups.


After the plastic dust-cap-and-shim is (carefully) removed.


There was no grease left in the cartridge bearing, only water. I never wash my bike using a pressure hose, or even a garden hose; all I use is a scoop; and I remove the seatpost and flip the bike upside down thereafter.


The non-drive side was pretty much in a similar state. There was almost no grease left, just a milky film. What do they use in there? Half-and-Half?

To have this occur within 563 miles (900 km) is unacceptable. Not surprisingly, the Race Face X-Type BB scored very low in MTBR Reviews.

Peter Verdone has an interesting take on the design flaw in Race Face's X-Type BBs:

Bryan and I did a little research on my failed Shimano and Race Face bottom brackets, and this is what we learned. The Shimano bearing cartridges were labled HIC (Japan) 6805RD, (25 ID,37 OD,7 WD) with 15 x 1/8" bearings and a steel retainer. The seals were superior to the Race face unit in every way. The side that failed did so because it was contaminated solid with grit, but the bearing still worked and not too poorly either. The good side was clean and greased and rolled very smooth. The Race Face bearings on the other hand had branded seals (always a bad sign) labled RACEFACE X-TYPE 6805 LLU MAX. This is a full complement bearing, meaning that they forgo a retainer and put as many balls in the bearing that will fit. These bearings for example had 30 x 1/8" balls. Full compliment bearings are only meant for high radial loads. They are very prone to failure under axial loading due to the cutout required to assemble the bearings. These types of bearings have no place on any part of a bicycle (not even for suspension links). The reason that the Race Face BB froze was because the full complement bearing only left 0.050" of gap for all of the bearings to share. Besides the fact that these bearings were rubbing against each other almost contiually, once the seals failed and some dirt was allowed in, the unit resembled more a mortis and pestle than a bearing. No gap was left for the dirt to go, so it was just go ground in by the bearings until everything locked up.


Since there wasn't any grit in the bearings (unlike this), I decided to try and salvage the bearings. Here, a grease gun proved invaluable.


Repacked non-drive side BB bearing.


Repacked drive side BB bearing.


Bearing seal replaced.


The salvage operation turned out to be a failure. Despite the introduction of fresh grease, the non-drive side bearing was pretty much gone.

Options available at this point:

Complete units:

Shimano XTR M970 External BB (fully compatible with Race Face X-Type) US$29.95 x 2 (much cheaper in Singapore at SG$60 a set)

Enduro Ceramic Hybrid Outboard BB Bearing Cup Set US$109.99

Enduro Chromium Steel Outboard BB Bearing Cup Set US$56.99


Reuse (fragile) dustcap/shim and BB cups:*

Boca Stainless Steel Bearing Kit US$94.95

Boca Ceramic Lightning Yellow Bearing Kit US$118.95

Boca Stainless Steel Race, Ceramic Hybrid Bearing US$67.95 each (need 2).

Phil Wood Part# PWX05 Mfg# 6805 Bearing US$23 each (need 2).


Reuse BB cups:**

Enduro Ceramic Hybrid Outboard BB Bearing Upgrade Kit US$65.99

Enduro Chromium Steel Outboard BB Bearing Kit US$14.00


* = Bearing press required. E.g. Phil Wood Outboard Bearing Replacement Tool.

** = Proprietary bearing press required.


I went for Enduro's Chromium Steel Outboard Bottom Bracket Bearing Kit and had them pressed in locally at Chapter 2 Cycle.


Race Face BB bearings (bottom) have an inner diameter of 25 mm, and require a 0.5 mm plastic shim. The red seal faces outwards, and the black seal, inwards. Shimano External BBs also employ a plastic shim.

Race Face X-Type BB bearing specs:
6805 LLU MAX
Outer Diameter (OD) 37 mm
Inner Diameter (ID) 25 mm
Width 7 mm

Enduro Outboard BB bearings (top, pressed into BB cups) possess a smaller inner diameter of 24 mm, doing away with the plastic shim.

Enduro Outboard BB bearing specs:
Outer Diameter (OD) 37 mm
Inner Diameter (ID) 24 mm
Width 7 mm


There are 2 problems with the plastic shims employed by Race Face and Shimano. In addition to rendering the crank spindle / Bottom Bracket assembly less rigid, it also makes cleaning and repacking the bearings more difficult. As the picture evinces, the plastic shims are also fragile. The one on the right broke when I removed it for the second time. The shims are critical for proper spacing of the crank spindle. Without them (or with a broken shim), the crank spindle would rattle around the bearing and ruin itself in short order.

Integrated plastic shim + dust cap specs:
Dust cap OD 40 mm
Shim ID 24 mm
Width 9.3 mm
Shim thickness 0.5 mm

BTW, if you think removing the plastic shim / dust cap without it breaking is difficult, wait till you try putting it back in  :-P


Doing away with the plastic shim / dust cap, Enduro supplies 2 pairs of auxiliary silicone seals with their outboard bearing kits.

Auxiliary seals (use one or the other)

Blue seal
OD 37 mm
ID 24 mm

Red seal
OD 40 mm
ID 24 mm

Both types of seal have an angled "lip" on the circumference, and a V-shaped, double-contact lip on the inside.


The instructions (PDF) state that the steel-backed o-ring seal outside the bearing MUST be removed. Some local vendors mistakenly reinstall them and then, upon discovering that the 40 mm red seal no longer fits, direct you to use the 37 mm blue seal instead. This is wrong. Enduro clearly states that the o-ring seal must be removed or it will interfere with the new sealing system.


Again, as official instructions (PDF) exist, a duplicate write up is unnecessary.

To reinstall the BB cups into the frame, I prefer Park Tool's new BBT-19 instead of the more common design, BBT-9. Sonny's Bike Tools makes a similar tool, X-Type / Outboard Bearing Cup Installation and Removal Tool, but it is made of aluminum and costs more.


In addition to offering a more secure grip, the other advantage of the Sonny's Outboard Bearing Cup Tool or the Park Tool BBT-19 design is that it allows the use of a torque wrench. Zinn and the Art of Mountain Bike Maintenance suggests a range between 35 to 50 Nm. I tightened mine to 42 Nm.


Enduro bearings are packed with Super-Web Grease. This grease is incredibly sticky and stringy — think Natto or chewing gum on asphalt on a hot summer day. However, as stipulated by Chris2fur (of Enduro) on a forum, additional grease MUST be applied outside the bearing seal:

You should apply grease on top of the cartridge bearing so the silicone seal is lubricated.

Lacking a tube of Super-Web Grease, I used Finish Line's Premium Grease. Again, a grease gun is a very handy tool to have here.


Slip on the red auxiliary seal, install the crank, and torque to 30 ft/lbs. OEM instructions here (PDF), or continue following Enduro's instructions (PDF). Check for side-play or side-loading:

Anytime you change anything on your outboard bottom bracket setup, you ALWAYS have to re-check the bearing side-loading. If you have the Hollowtech II, this is easy, since all you have to do is snug up the spindle end cap. If you have an outboard system that uses a standard crank bolt that gets torqued down, then you must test the tension as you torque the bolt down. Since the reddish orange silicone seals are slightly thicker than the blue spacer/seals, a Race Face type setup using a crank bolt may require the removal of a spindle spacer. Our online instructions (PDF) for this type of outboard system are pretty clear about this.

It will take a couple hundred miles (320 km) for the bearings to break in, but the increased stiffness in the cranks was immediately apparent.

Sometimes new is not better. While the external bottom bracket designs may be stiffer, bearing life seems to be significantly shorter. In comparison, traditional square taper bottom brackets last forever. The Shimano UN-71/72 lasted 8000 miles (12800 km) on Michelle, my 1992 Bridgestone MB-3.

With regards to square taper-spindle-to-crank-arm durability issues, I have a suspicion that loose or rounded square taper crank arms are principally the result of improper assembly procedures. E.g. not employing a torque wrench during installation, and consequently, failure to torque the crank bolts to proper specifications. Or, greasing the BB spindles — square taper bottom bracket spindles must never be greased. Square taper bottom bracket spindles should be cleaned of oil and grease before crank installation. Grease may allow the softer aluminum crank arm to slide too far up the steel (or titanium) spindle, causing it to round out.

Sunday, September 16, 2007

Bukit Timah Trail Group Ride


Victor couldn't get up and Guan Peng changed his mind, so it's just the 3 of us: (right to left) Mel, Nic, and moi.


When it comes to fingers, more is better.


What you should do when you come round a bend and spot your riding partner lying on his face...


First, check if he is conscious by softly calling out his name.

If he is, administer several swift kicks to his head before you make off with his singlespeed Surly  :-P

While Nic was busy humiliating squishies (riders with full-suspension) with his rigid singlespeed, Mel was practically a red rocket on the trail.


Post-ride grub: double-portion longtong.


Epilogue:
Total distance:  cyclo-computer 9.3 miles (14.9 km) / GPS dead
Total elevation climbed:  Altimeter 670 ft (204 m)

Saturday, September 15, 2007

Quadcycle


'Spent the week restoring Michelle, my 1991 Bridgestone MB-3, to operating condition. What's left: repacking the headset bearings; inspecting the cartridge bottom bracket; replacing cables and housing; lubricating thumbshifters (!!!), and servicing / replacing the ancient Shimano DX skipping freehub. Set up for touring, Michelle is a veritable workhorse. E.g. she has a lowest gearing of 24 x 34.


The first job Michelle found herself saddled with: hauling a pair of Shimano XT IS disc brake wheels from Upper East Coast to Upper Bukit Timah. This set up is the brain child of Peter. In this configuration, Michelle weighs at a hefty 39.8 lbs (18.1 kg).


Front view.


In this unique case, panniers actually improved handling by lowering the center of gravity. The green bungee cord was originally in place of the red cord, but it snapped as I negotiated Newton Circus.


The red bungee cord snapped just as I pulled into Dairy Farm. Note to self: you can never have too many bungee cords (or, for that matter, duct tape and cable ties).


Ahmad set up the rear light.

Riding with this load was interesting: sudden movements or changes in direction would cause the tires on the rack to yaw.


Nothing compared to this fella's skill (and strength) of course!

 :-P